I offer first-class piano maintenance and repair services for grand and upright pianos. All work meets the highest quality standards, whether the instruments are for professional, amateur or home use.
Piano reconditioning and restoration work is performed at my workshop in southwest London for clients in London, Surrey, the South East, and worldwide. I offer full or part-reconditioning according to my clients’ requirements.
Further along this page you’ll find four short articles covering some of the key techniques for maintenance and care of your piano:
Restoration/repair/refurbishment are oft-used words, but how detailed is such work, to what extent is it necessary, and when done, how good is the result?
I will visit to assess the instrument, clients’ requirements and overall viability of the job, and produce a written quotation, offering a fixed price. Sometimes the piano will be beyond salvage; often, however, it will be possible to rejuvenate with simply a day’s service; sometimes I’ll spend several days in your home, or even weeks on your piano in my workshop.
Clients are welcome to visit the workshop to observe restoration and reconditioning work on their pianos.
A client’s 1908 Steinway model A was recently in the workshop for part-restoration. He was happy to leave the casework and its furniture as-is, and to ‘make good’ the existing hammers, dampers, strings and most felts.
These I examined, and, in spite of the piano’s advanced age, they were in excellent condition. However, the piano clearly needed improving; this took the form of dismantling of the major components of the action and keys, followed by full cleaning, refacing the hammers, reassembly, regulating, and tuning to concert pitch.
The price for this work was a fraction of a full restoration (which I would also be happy to perform), leaving the instrument in a beautiful condition for a practical musician to enjoy, with the added benefit of preserving and making-good as much of the original material in this venerable, patinated instrument.
In the workshop: Sound Check
In this short informal video I perform a crucial sound check on a Stroud baby grand piano undergoing complete restoration. This provides me with a baseline for tuning and regulation.
Video by Charles Ryder and Tim Hendy.
Here’s a customer-repair that I’m just starting; it’s for a lady in south west London. I’ve just taken the piano in, and as you can see it’s got all the furniture removed, the top’s taken off, the fall’s out, the music desk, so you can see the internals. And I’m just going to run through it now just so I have in my middle ear, as it were, a memory of how it is, now, compared to how it will be when it has all-new strings, tuning pins, damper felts, hammers, it’s regulated and tuned to A440. I’m just going to run through it quickly now.
Tim Hendy, 24 October 2013
What customers say ...
My baby grand Blüthner piano had in the last few years deteriorated to the point of becoming unplayable. I had sadly come to the conclusion that it was probably beyond redemption.
Tim found multiple problems with it which he rectified partly in his workshop and then in situ in my house. I could see for myself his enormous patience and skill and the painstaking care he takes. He is clearly a very fine and dedicated craftsman and I feel fortunate to have discovered him. He has breathed new life into my piano and it sounds better than I can ever remember. I couldn’t be more delighted.
A professional musician
Dear Tim, Since getting back from holiday I have been in Heaven playing my gorgeous “new” piano.
I must say I was initially a bit worried that it would be very different and not feel like my piano anymore, but that’s absolutely not the case. In fact it’s everything I could have hoped for - still my old familiar friend and yet so much more.
The bass and treble have a new ring of richness, resonance and brightness and the general evenness throughout is a joy. I had got used to certain notes being a bit dead or a bit edgy but now I can play knowing that it’s all going to respond in the same way.
I’m really enjoying playing some of my old repertoire and hearing it and feeling it afresh. The slightly stiffer touch is perfect now and the sound is just glorious.
So, thank you so much for doing such a wonderful job. I will always recommend you to anyone that is looking for a similar “facelift” for a tired old partner.
Mrs Sally Schaub, London
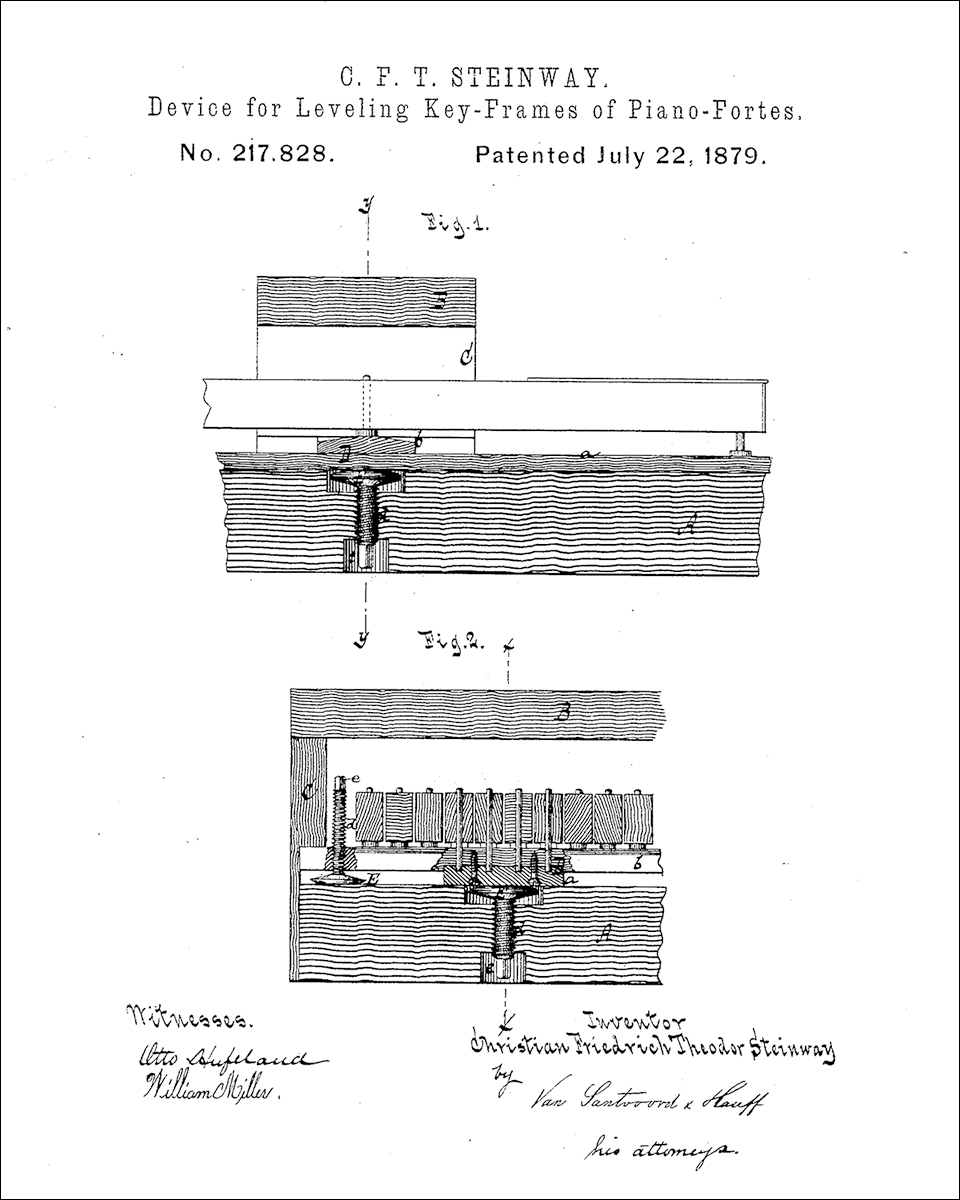
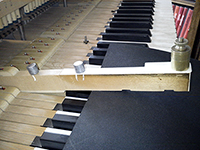
Bedding the Steinway Keyframe
Steinway designed the frame on which the keys are located, called the keyframe, to be adjustable for wear and tear, and for the movement of its components, which inevitably occurs due to warping and shrinkage.
No other maker in the late-1800s had this feature, but now almost all have adopted it, which is simple but takes a lot of practise to set up correctly.
No proper regulating of a grand piano with adjustable keyframe is complete unless this work is undertaken.
The system is necessary because the whole keyframe shifts from left to right on depression of the soft (una corda) pedal, so it therefore needs to glide, but remain in contact with the keybed correctly at all times. Uprights don’t need this, because their keyframes are fixed, and the left pedal merely moves the hammers closer to the strings - which is why an upright’s left pedal is called a soft pedal rather than an una corda, as it doesn’t shift the action and keys to miss one of the strings (unisons), in the groups of two or three strings that make one note, on all pianos.
The adjustment firstly involves the scrupulous cleaning and gentle sanding of keyframe and keybed, taking care not to sand the front and rear half inches of these or the hardwood buttons in the keybed.
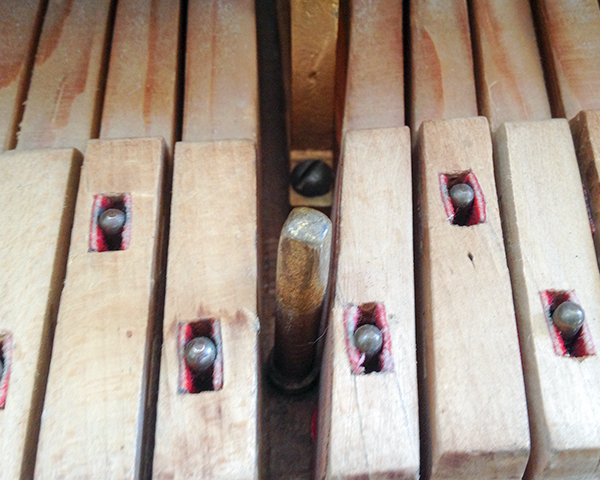
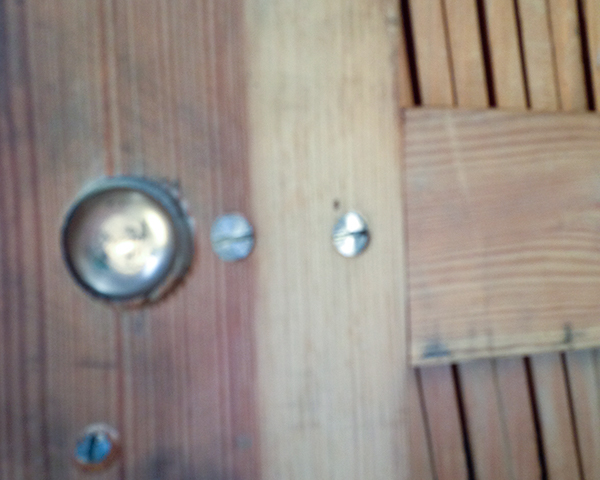
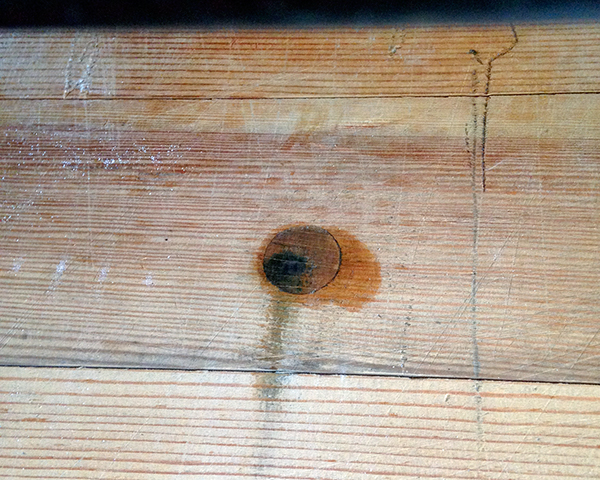
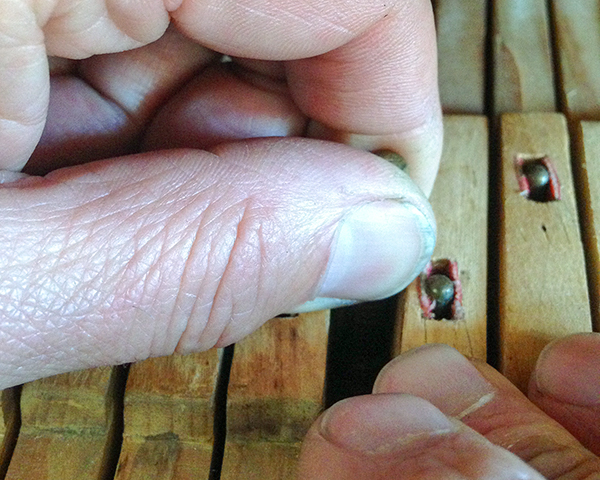
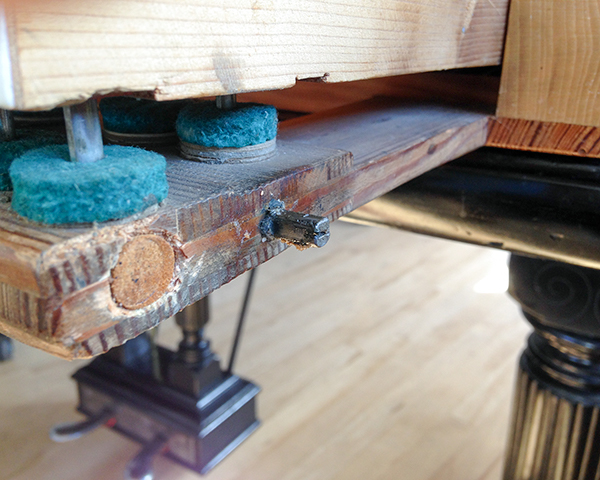
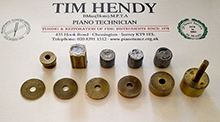
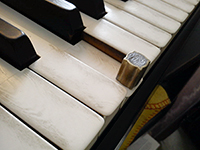
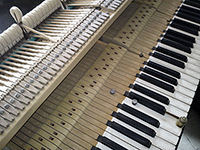
The pictures show the key-blocks, the pins on which they bear, the domes, and their stems, the adjusters; also, the hardwood inserts in the keybed (that part of a grand piano on which the keyframe is located, and on which the domes bear).
Keyblock showing locating-plate
Dome adjuster
Dome
Hardwood insert in keybed
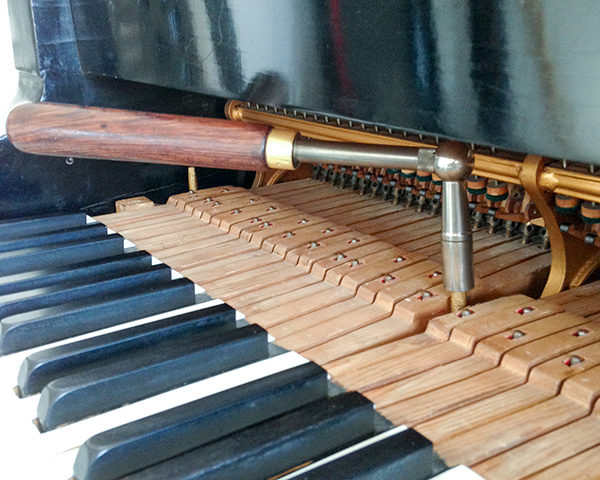
With the action and keys properly located in the keybed, and the shift on the pedal correctly adjusted and lubricated, and the keyblocks properly screwed down, the keyframe is then bedded at the front, so it doesn’t slap - this is done by tapping it with the fingertips along its entire length, and if it knocks in a hollow way, remedial action, is called for, such as sanding, or careful adjustment of the keyblocks’ bearing on the keyframe’s locating pins, with gummed paper. Then, the painstaking process of adjusting the domes is undertaken, the first dome being adjusted for pressure on its hardwood bearing point in the keybed. This is done by gripping the stem between thumb and forefinger of one hand, while tapping the keys just in front of the middle bushing chasing with the finger tips of the other.
When lifted hard, a hollow knocking should be clearly heard; this is achieved by raising or lowering the dome by means of a short piano tuning crank being placed on its stem, and turning clockwise to increase pressure, and vice-versa. Naturally, adjusting one dome correctly affects all the others, always - so it’s a process of constant adjustment and back-tracking, which can easily take an hour or more.
When done, the key-frame shifts easily, bearing as it does only on its six domes and the front and rear half inch of it, and the keyblock-locating pins. As one is, in effect, raising and lowering the middle keyframe rail, thus influencing key-height and depth of touch directly, no proper regulating of a grand piano with this system is complete unless this work is undertaken.
Raising the dome adjuster manually while tapping key chasings to adjust for the right ‘knock’ (bearing)
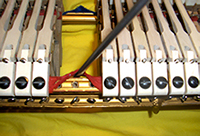
Keyframe guide-pin upon which keyblock locating-plate bears
Adjusting the dome, up and down, to give the correct bearing
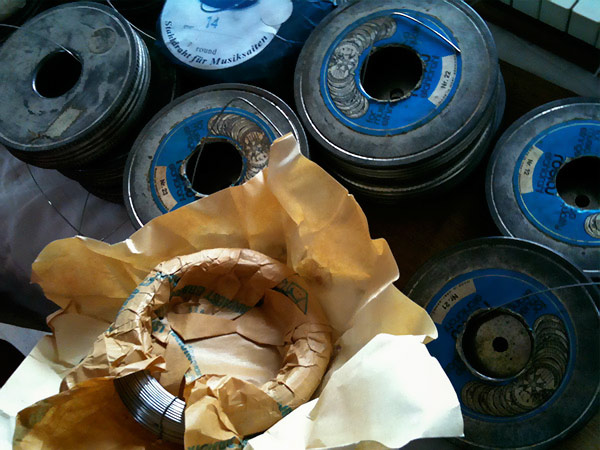
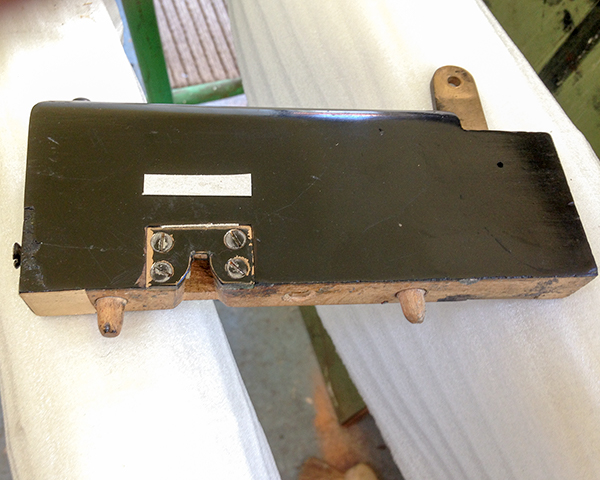
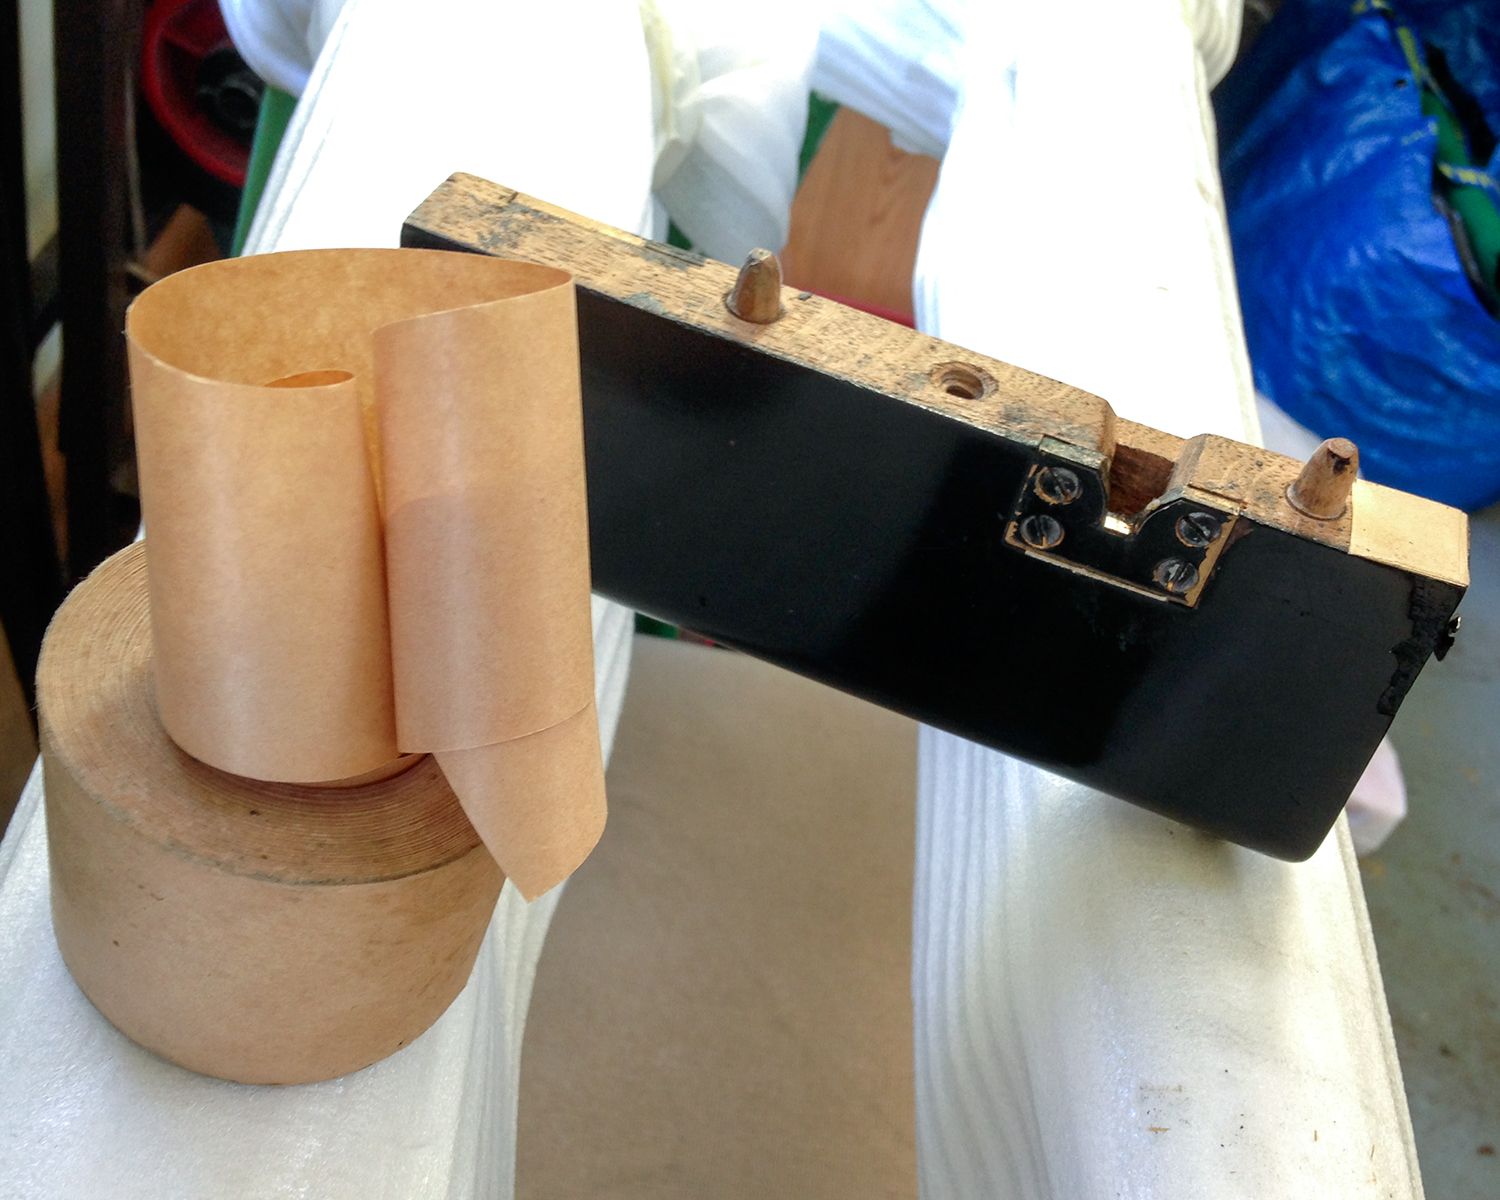
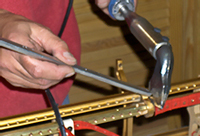
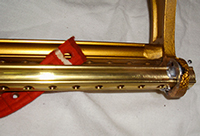
Replacing Steinway Tubular Metallic Action Rails
Steinway’s Tubular Metallic Action, an ingenious design patented in the late 1800s, has been employed in all of their iconic grand pianos ever since.
It is a clever, compact, light-weight, strong design providing the structure to which the bulk of the piano’s moving parts are attached. Of seamless brass tube design, with a hardwood core, it is a system unique to Steinway.
All designs have their drawbacks, however, and Steinway action rails are prone to splitting and warping, as the hardwood core can swell in high humidity, causing the inflexible outer brass tube to crack - typically along whole sections of the 130cm long rail.
The pianist generally will become aware of the declining quality of the piano’s action only gradually, and a piano technician with specialised knowledge of the Steinway grand piano action is then needed to diagnose and rectify the problem.
Inspecting the rail for splits
Cutting rail, having marked its position, prior to removal
The split rail is removed section by section
Ready to receive new rail
New rail wedged temporarily in place prior to soldering.
Pianos should have an even key-weight throughout the compass. The starting point is a 20 gramme up-weight, with a 54g down-weight.
That’s the ideal, but the reality is often different. Perhaps the piano had new hammers fitted at some point and the key weight wasn’t adjusted afterwards, or perhaps the key bushings and felt bearings - called ‘centres’ - have tightened with moisture or lack of use, or maybe the keys were not weighed up at the factory at all.
Whatever the reason, we have all, as pianists, from time-to-time had to play on an instrument which was so light to the touch that our fingers ran away with us, and sometimes the keys didn’t return properly to their normal resting point - and at other times we've had to make something of a piano which was so sluggish in the touch that it was like playing through thick treacle. Exhausting, both conditions.
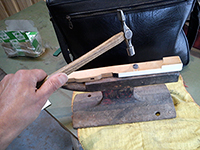
Key weight gauges and lead weights
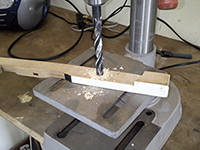
Gauging keys for lead weight insertion
Drilling in preparation for inserting lead weight
Inserting weights
The remedy is to check through all of the centres in the piano’s action, and ease its keys, to ensure the correct tolerances and frictions - and to polish balance pins on the keyframe and lubricate certain leathers and felts with french chalk. Only once all this is done can the action and keys be assessed in terms of weighting, by means of ‘taking a reading’ with an adjustable weight and individual lead key weights. Take a glance at the pictures above, and you will see the keys being measured for weight, marked with chalk for the insertion of the lead weights, drilled individually to accept these new weights, and then having them inserted.
Sometimes a pianist will have his or her individual requirements; recently a client asked me to load her piano keys to give a weighting of 58 grammes throughout; quite a heavy downweight, but the upside was that the upweight, and therefore repetition, became tremendously good.
I am extremely happy with Tim’s work. He is a piano technician of the highest quality. Ten years ago he completely replaced the action on the August Foerster piano I have had since childhood.
Recently I bought a new August Foerster. I prefer to have a heavy touch to the keys. This is important for me since I am a piano teacher and this enables me to spot more easily the errors in my students’ touch. With Tim’s help I decided that 58g was the best weight. Tim came and loaded the keys to that weight. I was impressed by the speed and precision of Tim’s work. And his work is very reasonably priced. The result was excellent. I am now much happier with the piano.
Thanks Tim. Great work!
Elza Lusher, Egham, Surrey
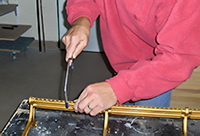
Fitting Health & Safety approved wheels for your piano
Grand and upright pianos are very stable and safe in general, but if they are to be moved frequently, they should have special wheels and brackets fitted.
On any grand piano, an A Frame, which connects the three legs at their bases, can be installed, and on uprights one can either fit larger double-roller castors, or heel-and toe-kits, which do the same job while increasing the piano’s base, making it all but impossible to topple over.
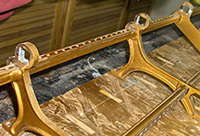
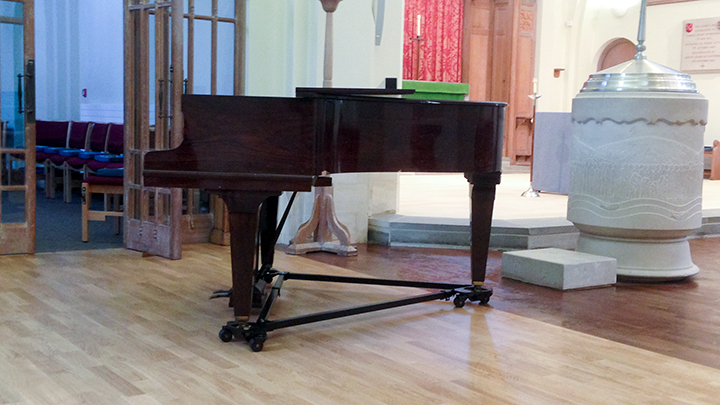
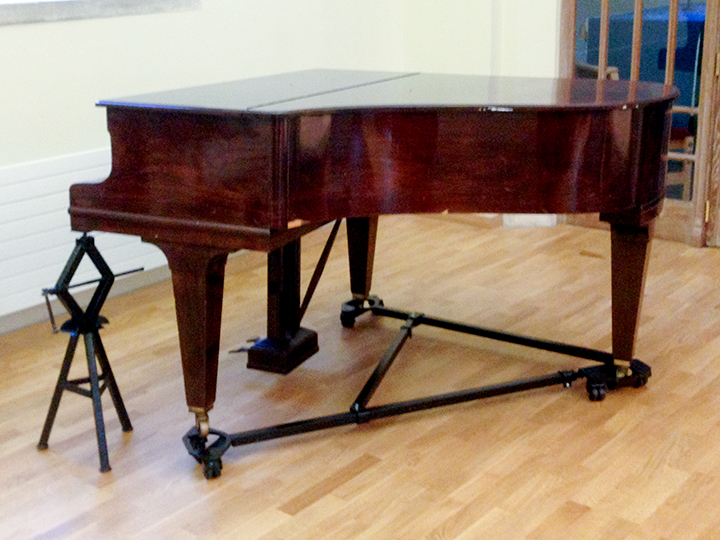
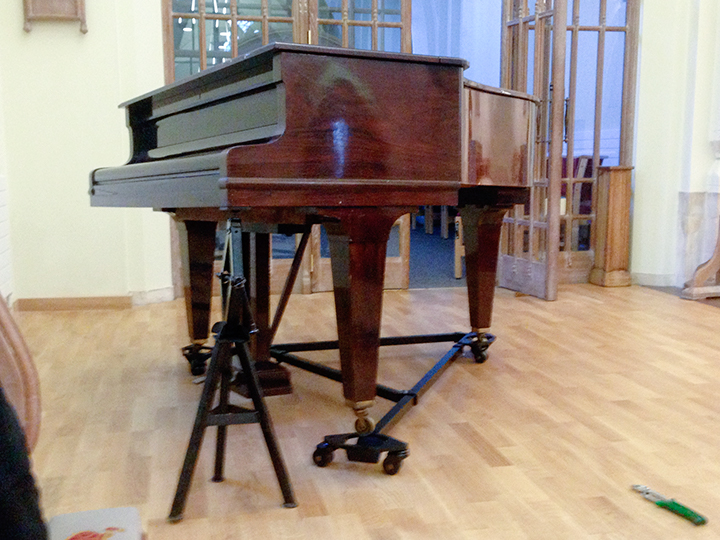
Completed installation of an A Frame to the Grotrian Steinweg grand piano in St Mark’s, Surbiton.
Most schools and churches have these fitted as a matter of course, as, apart from safeguarding the piano's health during moving, and facilitating safe, easy relocation by one person, it is, nowadays, a Health and Safety requirement.
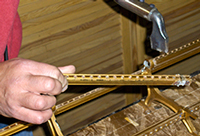
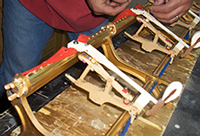
I am able to fit this equipment to your piano very competitively and quickly, and am happy to quote for this on an individual basis, to suit your needs/those of your institution. I do this in situ, saving transportation costs; the pictures document the installation of an A Frame to the Grotrian Steinweg grand piano in St Mark’s, Surbiton.
Two legs set, the third under adjustment.
Preparing to lower the piano onto the final A Frame support.
First-class piano tuning, maintenance and repair services in